The other day I came across a lovely diy video on youtube to make your own hair bow accessory. Not one to let go easily, I was eager to give it a shot! A reason for doing this was also to use one of the many cloth bags (used to bag products in some stores) that seem to be lying around my room for the longest time. I've tried to use them for storing items, but their odd size makes them pretty much useless to me. Till now! You can
watch the video tutorial if you want, but I still documented the process.
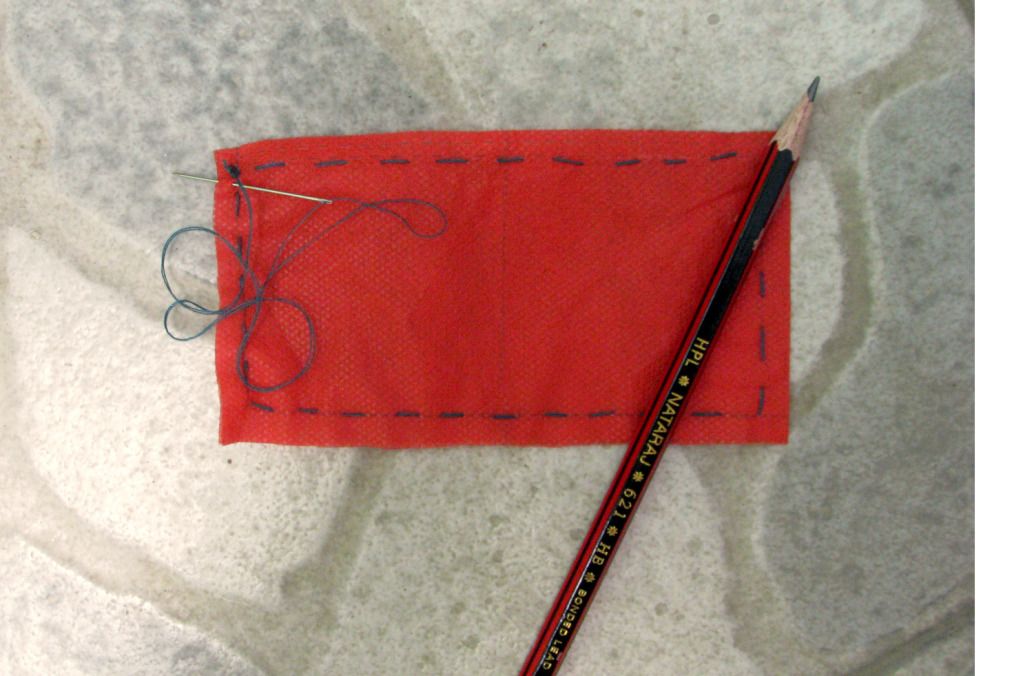
Items needed: Unused cloth bags (or some stiff cloth), scissors, needle and thread, lace or any other decoration.
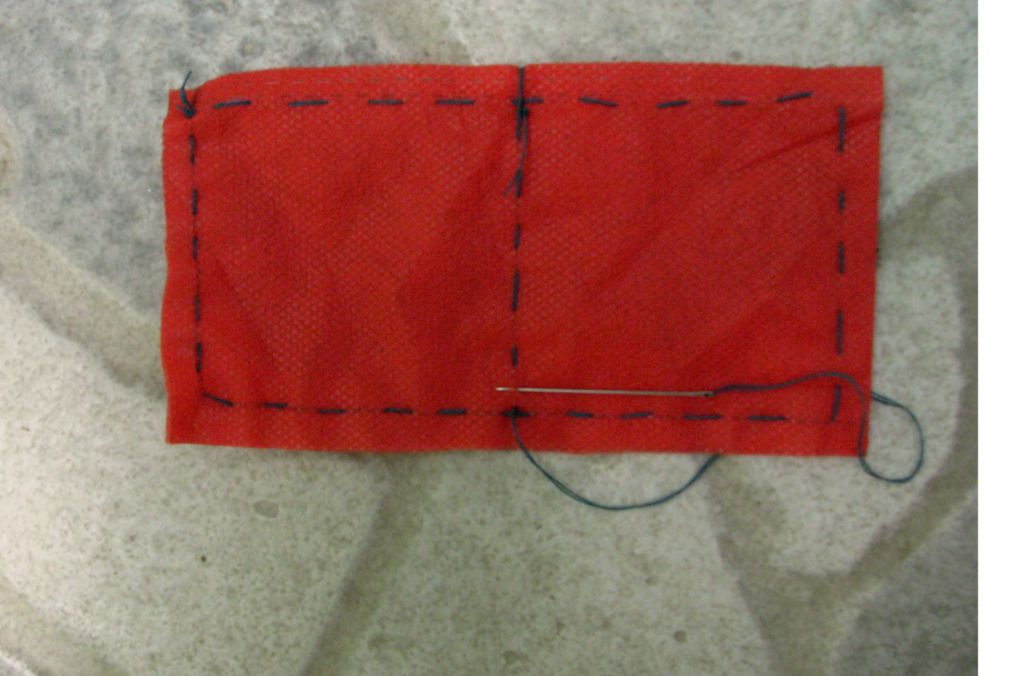
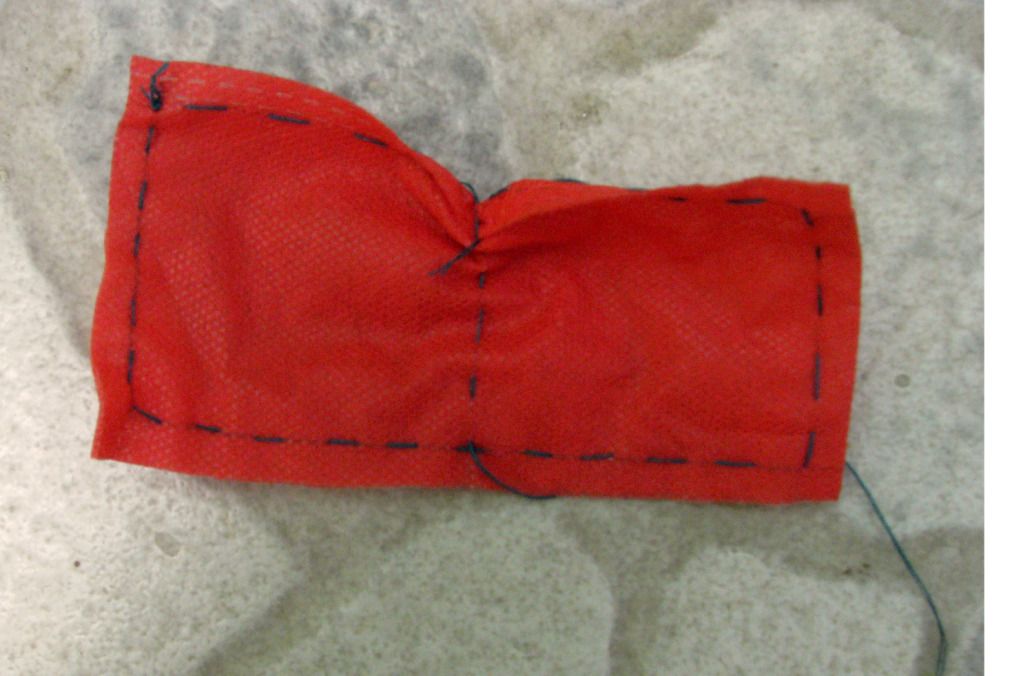
Begin by two pieces of the cloth into rectangles. I cut mine to 6cm X 12cm. Stitch around it to hold the two pieces together. You can do this with same colored thread, or use a totally different one like I did. Stitching enthusiasts can try different kinds of stitches, I went with one of the only ones I know, the uneven basic. Fold the cloth to find the central crease and mark it.
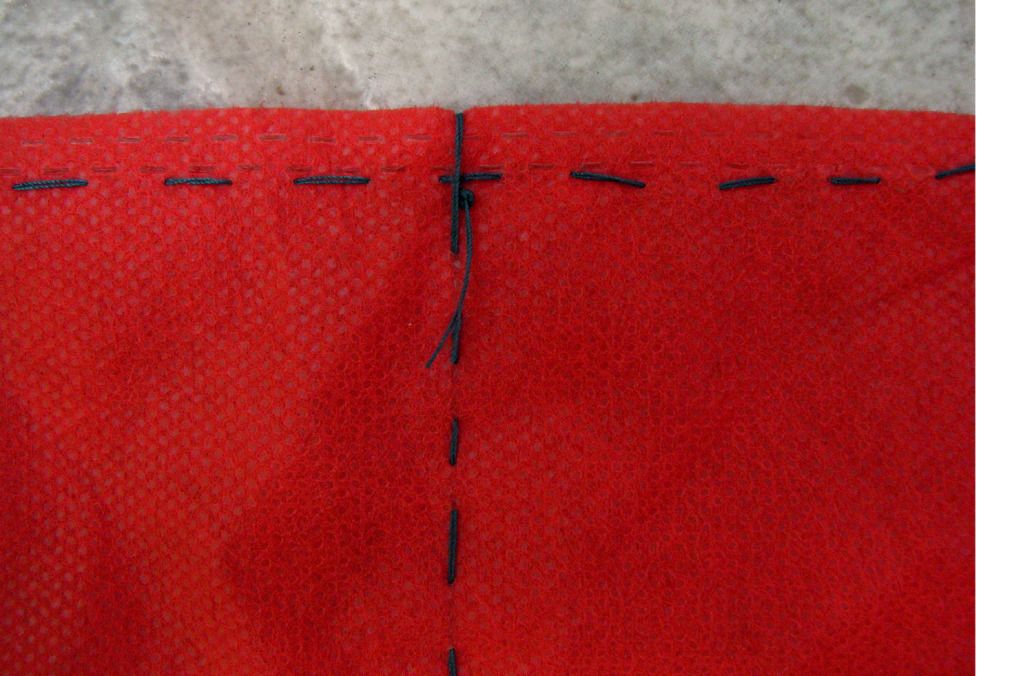
Begin stitching the center by looping the stitch as seen above. Another tip is to keep all the knots of the thread on one side (which will later become the back of the bow).
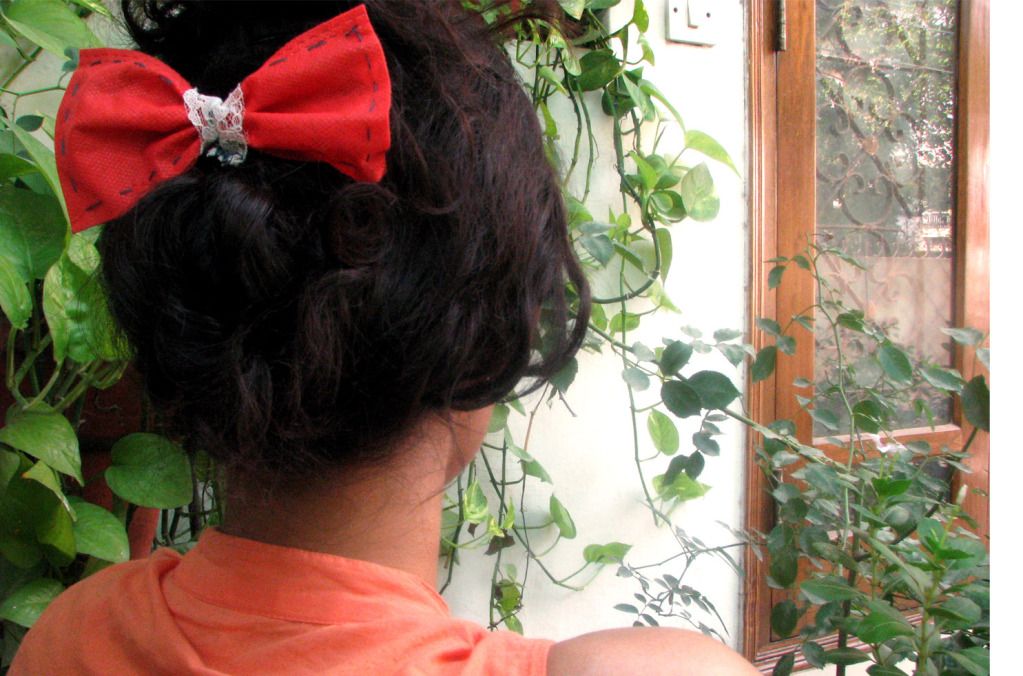
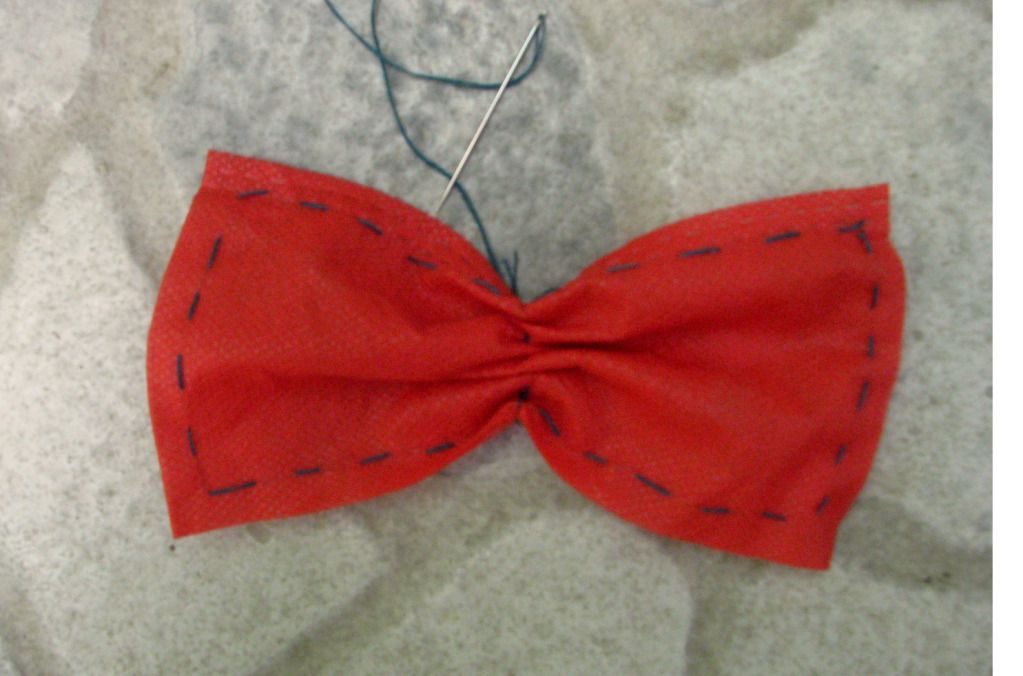
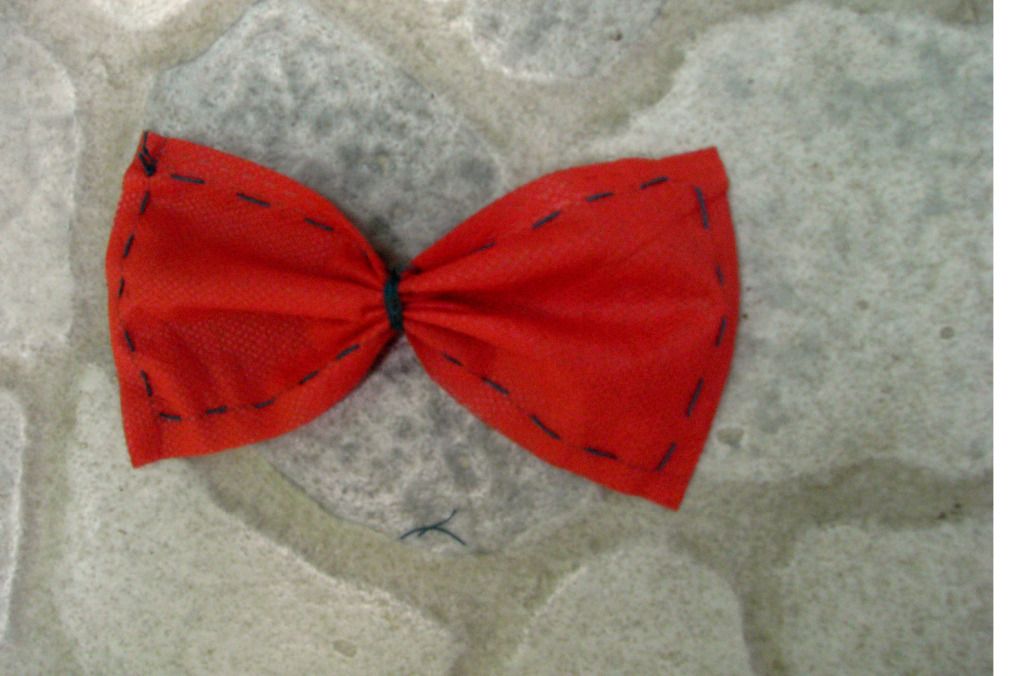
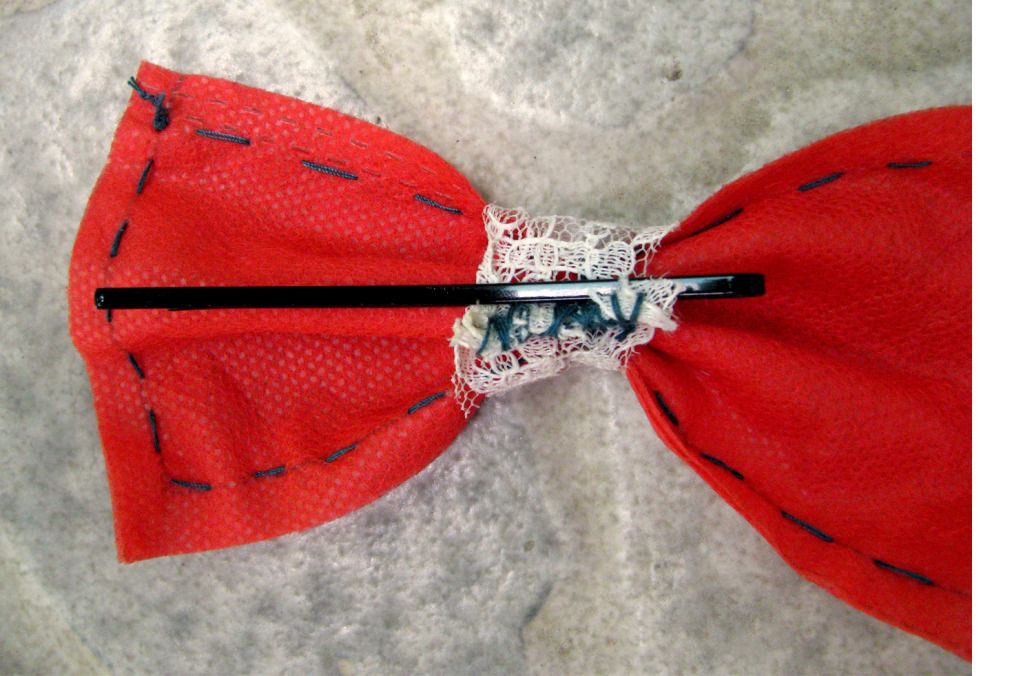
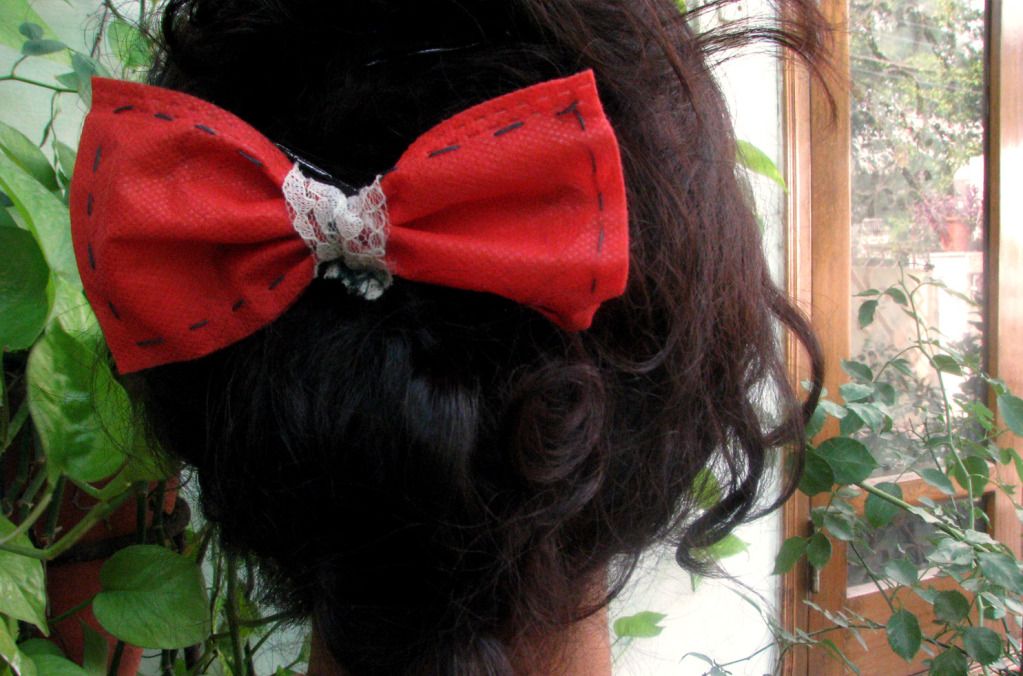
Once you stitch the center, pull the thread gently to form the puckered portion of the bow. Once the shape is to your liking, loop the stitch like when you began. Loop the thread around the entire cloth piece a bunch of times to ensure that the shape doesn't change. Finish by tying a knot. You now have your basic bow. You can leave it at that, or add decorations (like the lace I added!) Use it as a hair accessory by sliding a bobby-pin into the back.
In retrospect, I could've used thicker cloth. But then I could not bask in the glory of recycling something, could I? A messy bow for messy hair. Sigh, perfect.


Comments
Post a Comment
Thanks for stopping by! :)